Buttonholes
I know you’ve been there. At the end of the project and your last hurdle is the buttonholes and you procrastinate because you’re so nervous about messing them up and getting more frustrated. If this is you, you are NOT alone, it’s one of the most common questions I get in lessons and workshops.
Here are my top tips for getting your buttonholes tip top and finally wearing that shirt, those jeans, that skirt, dress or vest. Let’s get to it!
First - ID where the buttonhole stitch is on your machine. There are a few different kinds of buttonholes:
One step - These buttonholes are breeze when they work well. You set the settings, put the presser foot down, press the foot pedal and the machine does all the work. These begin and end in the same place and will sometimes keep stitching until you stop pressing the pedal. So pay attention to when the buttonhole is complete! Computerized machines will often stop on their own when the buttonhole is complete.
Four step - You’ll need to actively sew and choose the size of the buttonhole by watching for your (previously marked!) indications of when to turn around. These usually use a small white plastic or metal presser foot with red notches that indicate 1/8”s of an inch so you can see how far you’ve sewn.
all you, baby! - These buttonholes are done using your zigzag stitch. Older machines that only straight stitch and zigzag can use settings instead of stitch selection to acheive a buttonhole. You’ll create a rectangle by making a wide bartack at each end of the buttonhole and connecting them with narrow bartacks down each side.

Don’t forget to leave your threads loose and then use a hand sewing needle to bring them through the back of your garment, tie them off and bury them in the seam allowance.
Often buttonholes are colour coded like the photos below where the stitch selector is a buttonhole shape in blue, then the length has a blue buttonhole shape between the 0 and the 1. Or you might have a four step buttonhole where each number 1-2-3-4 is a separate stitch or it’ll be 1-2/4-3. If you don’t have anything that looks like a buttonhole, it’s all you baby! Use your zigzag to make wide and narrow bartacks instead to create a rectangle.

Pay attention to that reset setting as well! If your machine has one, that’ll be how to tell the machine that you’re starting a new buttonhole. Otherwise it’ll continuing sewing a long narrow bartack!


This image shows the length on the buttonhole setting (at the top) and the buttonhole stitch selected (on the bottom).
The photo here shows a computerized machine, I just need to touch the buttonhole I want and the machine will set the settings for me.

Once you have your stitch selected, get your settings right. This would be a good time to get our your manual if you have it. If not, then look for indications (again, usually colour coded) that show where your settings should be. On many modern machines that means the stitch length between 0 and 1 and the width as wide as it’ll go.
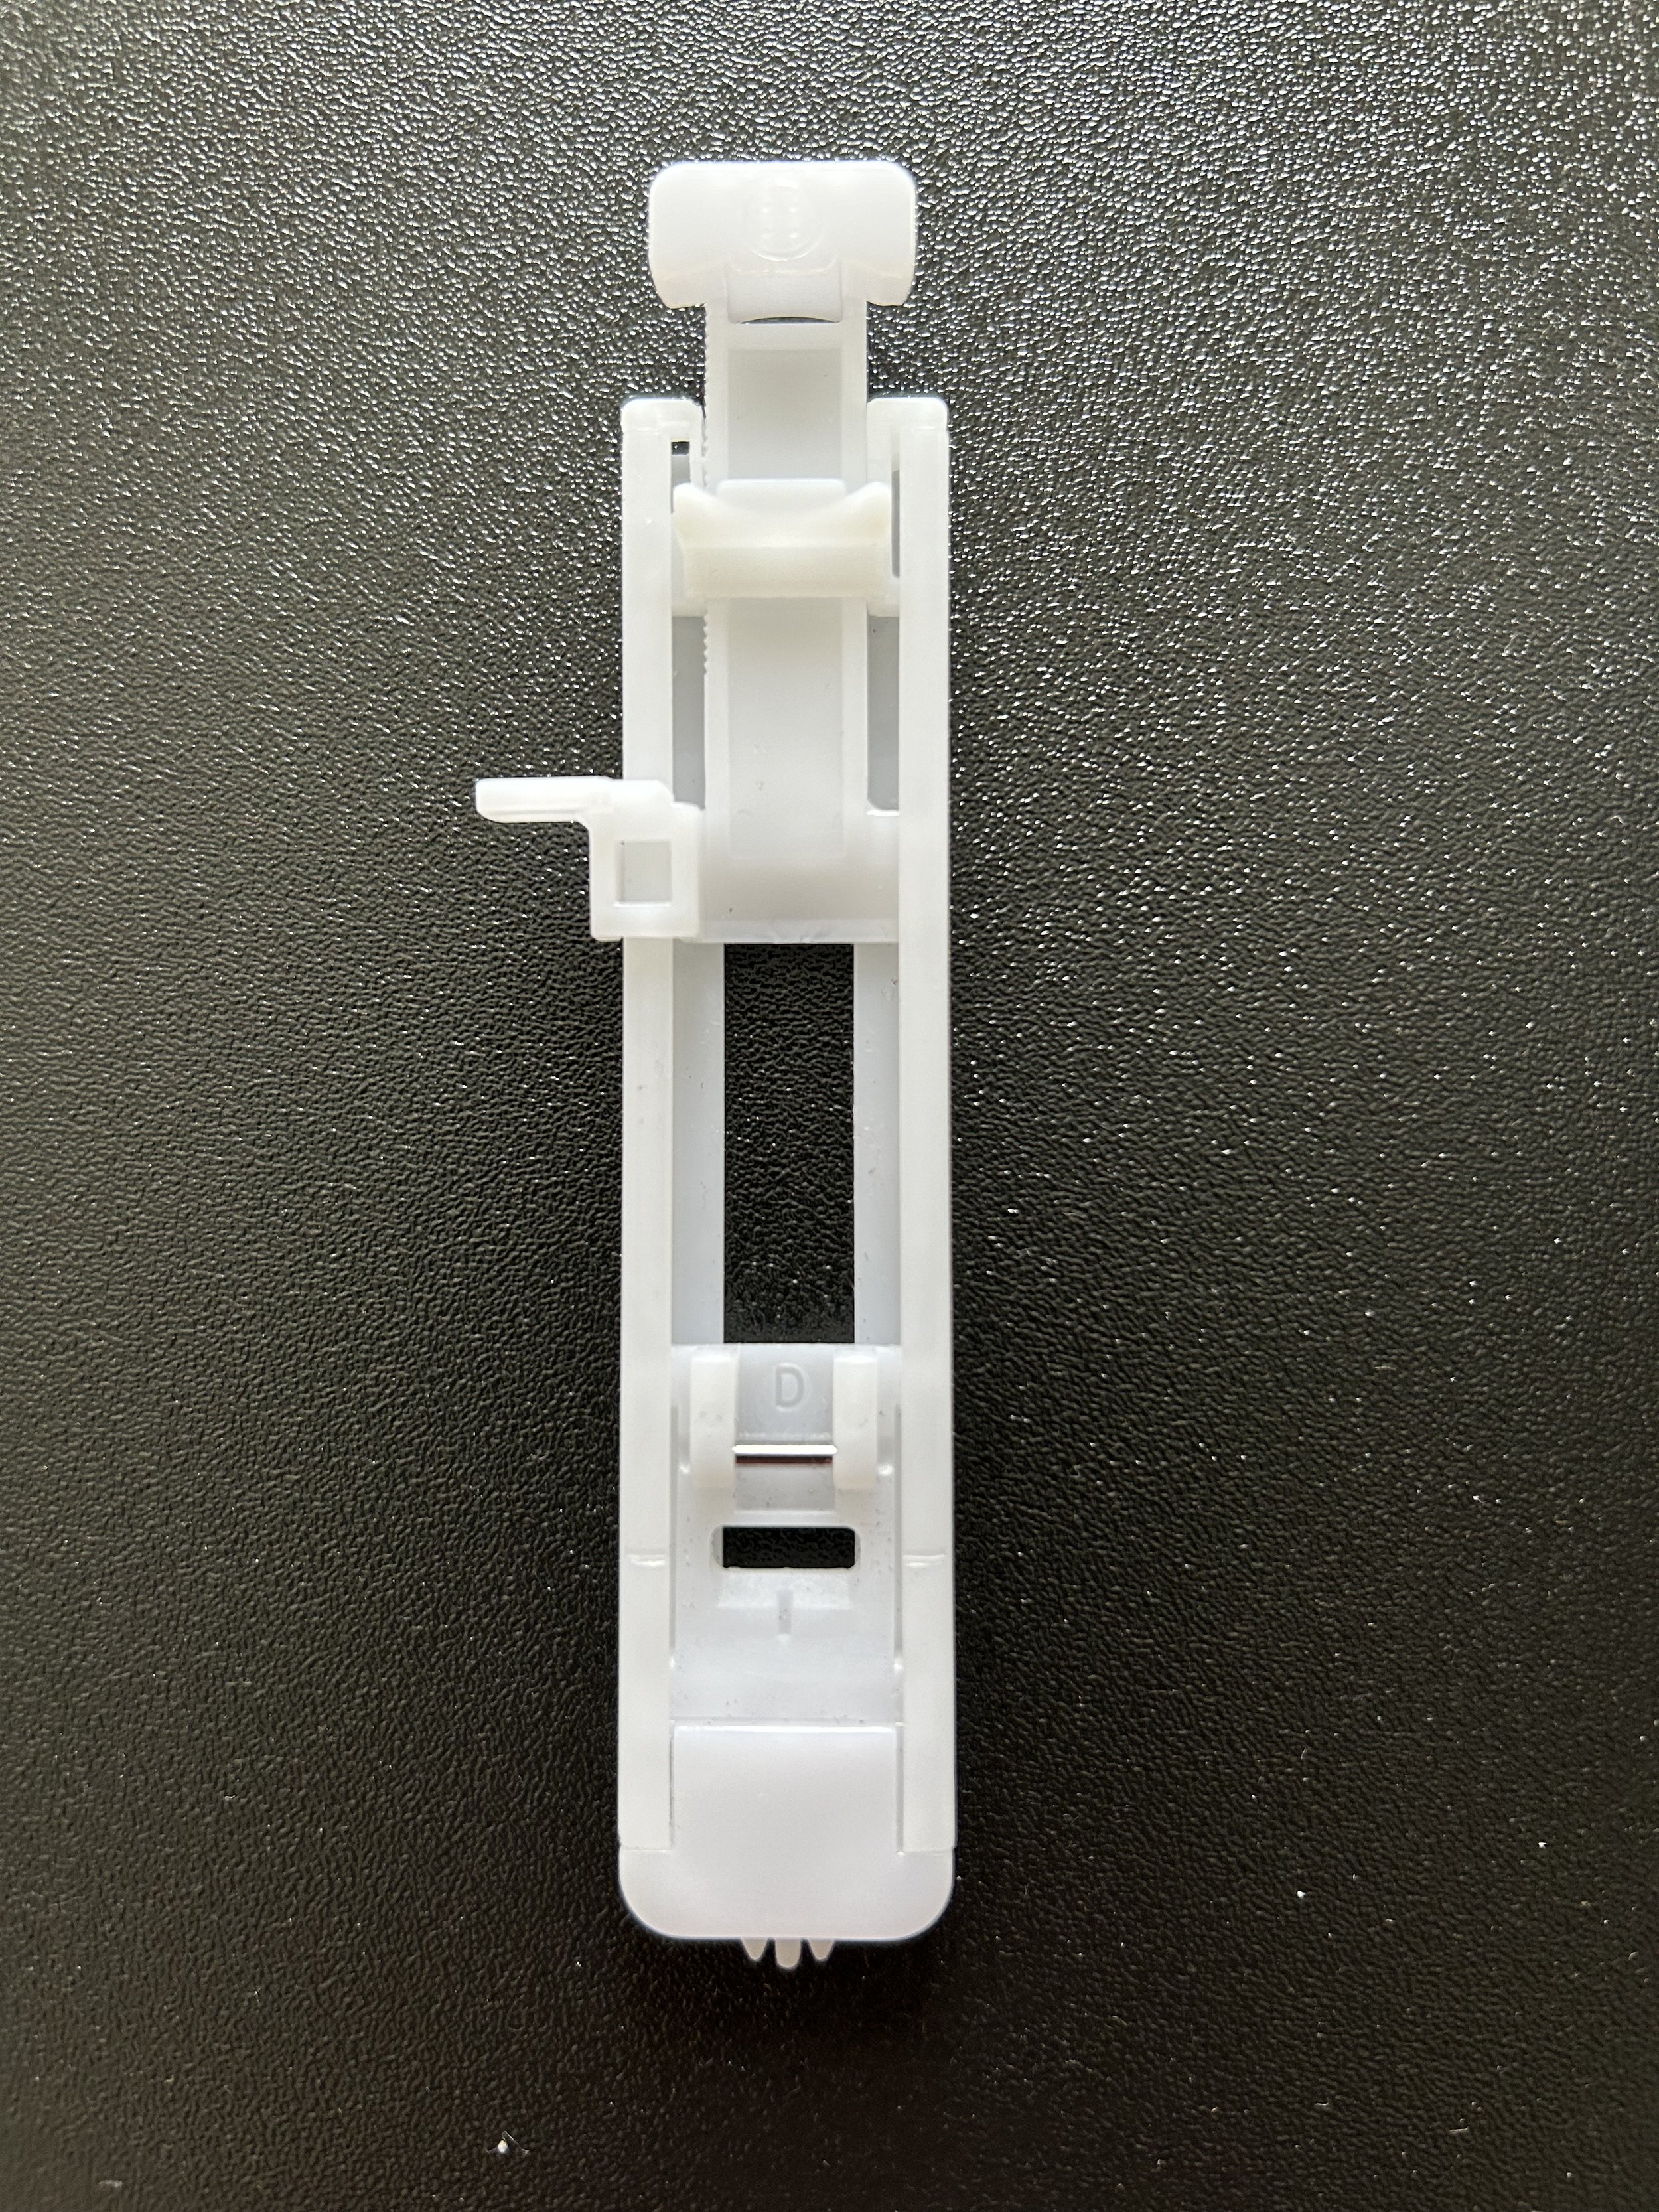
If you have a one step button hole, you will likely have a long, narrow, white plastic presser foot. It will have an adjustable end where your button will be inserted. This is to allow the machine to make sure that it makes an appropriately sized button hole for your button. Button holes need to be about 1/8” to 1/4” larger than the button itself. You’ll insert your button into that little spot and then close the end of the button hole foot tight against your button.
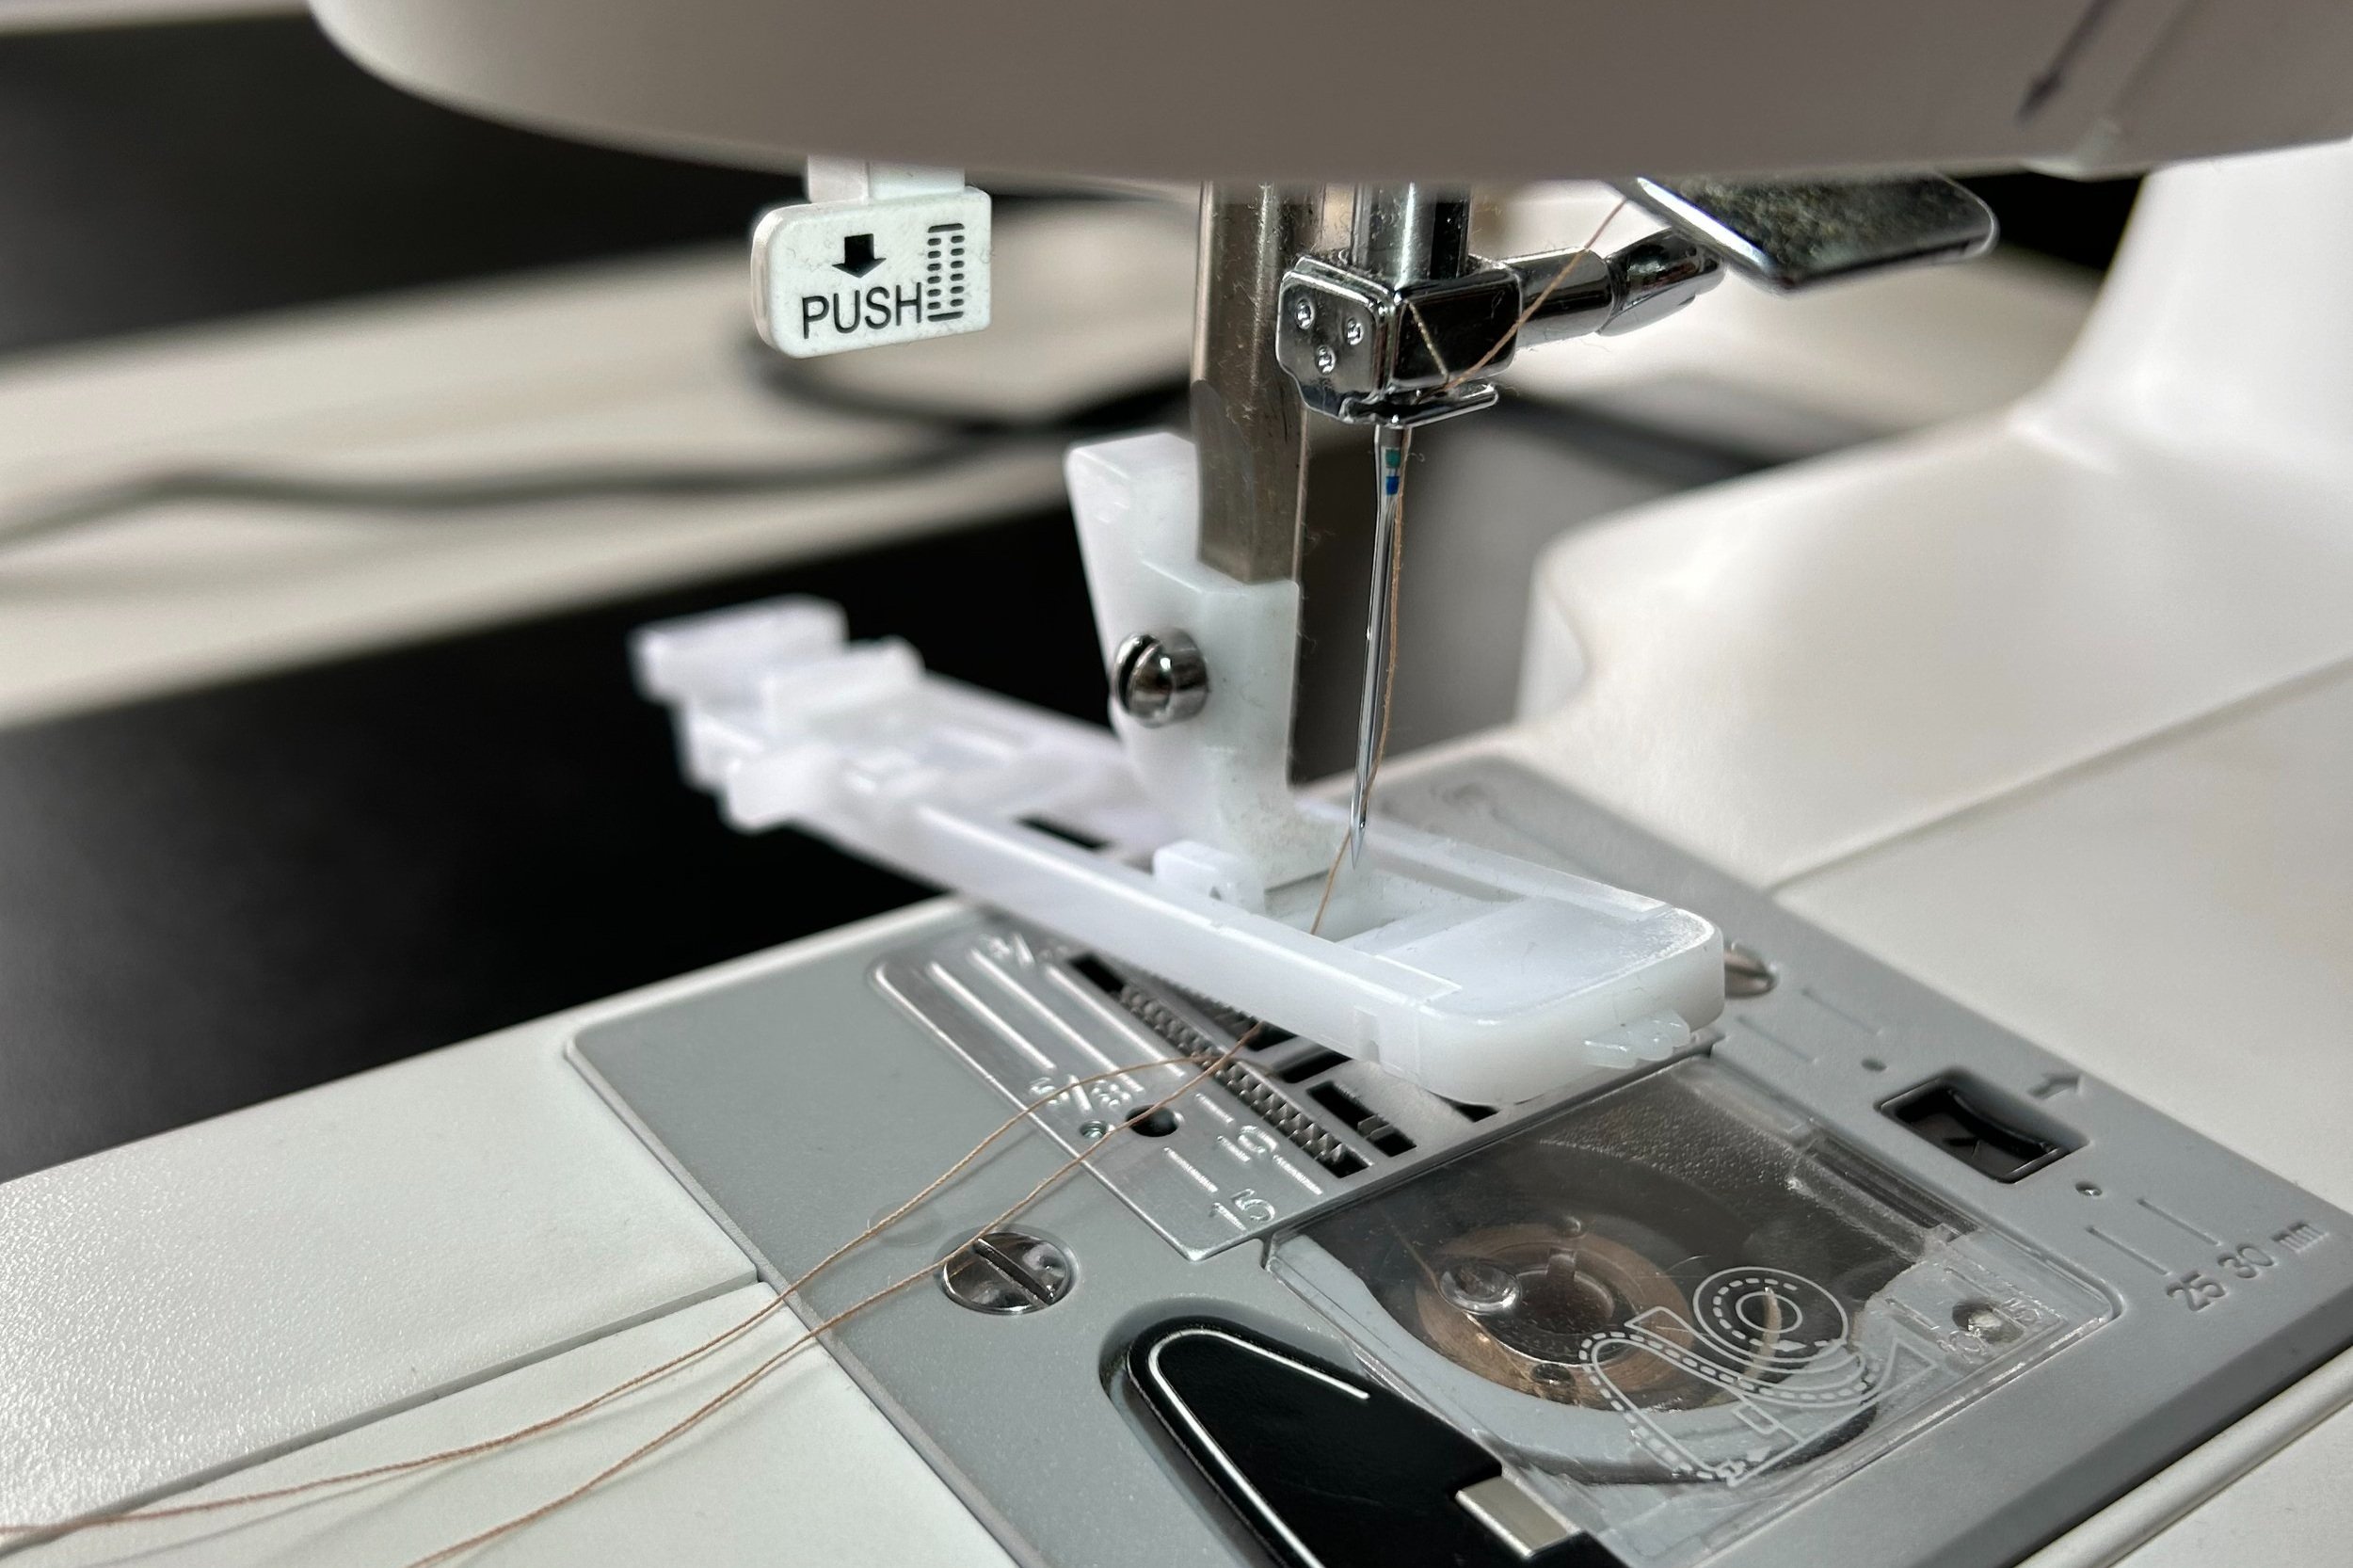
Check your machine for a button hole lever that will be a little piece of plastic with a buttonhole engraved on it or otherwise indicated that comes down from the bottom, left-hand part of your machine by your presser foot . This lever it clicks forwards and backwards and it controls your machine knowing when to change directions as your buttonhole is being sewn. Often it will be sewing from the bottom, left-hand side of the rectangle to the top left-hand side of the rectangle. Once the button hole, presser foot hits that lever it will click forward and the machine will know that you’ve reached the end of the button hole. It will then do a wide bar tack and start sewing back towards you. The button hole lever needs to be reset with each buttonhole by clicking it backwards usually, but of course, check your manual.

Always, always, always practice a button hole on a scrap of your fabric. Usually buttonholes will sew in a specific direction from bottom left, around the rectangle, then back to bottom left, but this is not always the case! I have seen some INTERESTING things that different machines will do when it comes to sewing buttonholes so make sure that you are practicing on a scrap that is appropriate to your project. Not only the same type of fabric but also as many layers as you will be sewing through, including any interfacing. Often times you will have two self (outside) layers and one or two layers of interfacing. Take a 4”x4” scrap and then sew your buttonhole test right in the middle of it so you can see in which direction your machine will sew the buttonhole.

When it comes to sewing your buttonholes on a finished project you have to take into consideration your seam allowance. The seam allowance creates ridges on either end or just on one end of where your buttonhole will need to be inserted on a waistband or placket. For example, you will have three allowances to consider the top the end of the waistband and the bottom of the waistband.
Those three seam allowances need to be graded so that you can achieve a buttonhole that is evenly tensioned and easy to sew (without a lot of fabric manipulation while sewing). When the seam allowances create too large of a ridge there ends up being a valley in your fabric that your presser foot has a really hard time feeding the fabric through because it will be coming down the mountain (of your seam allowance) into the valley (of your placket or waistband or cuff), and then back up to the other mountain of your seam allowance. You can see in this linen example below how there are four layers of fabric at each end, and once folded there will be only two layers in the middle where by buttonhole will go. The cross piece has the seam allowances sewn down, but not graded and my buttonhole is a little wonky.
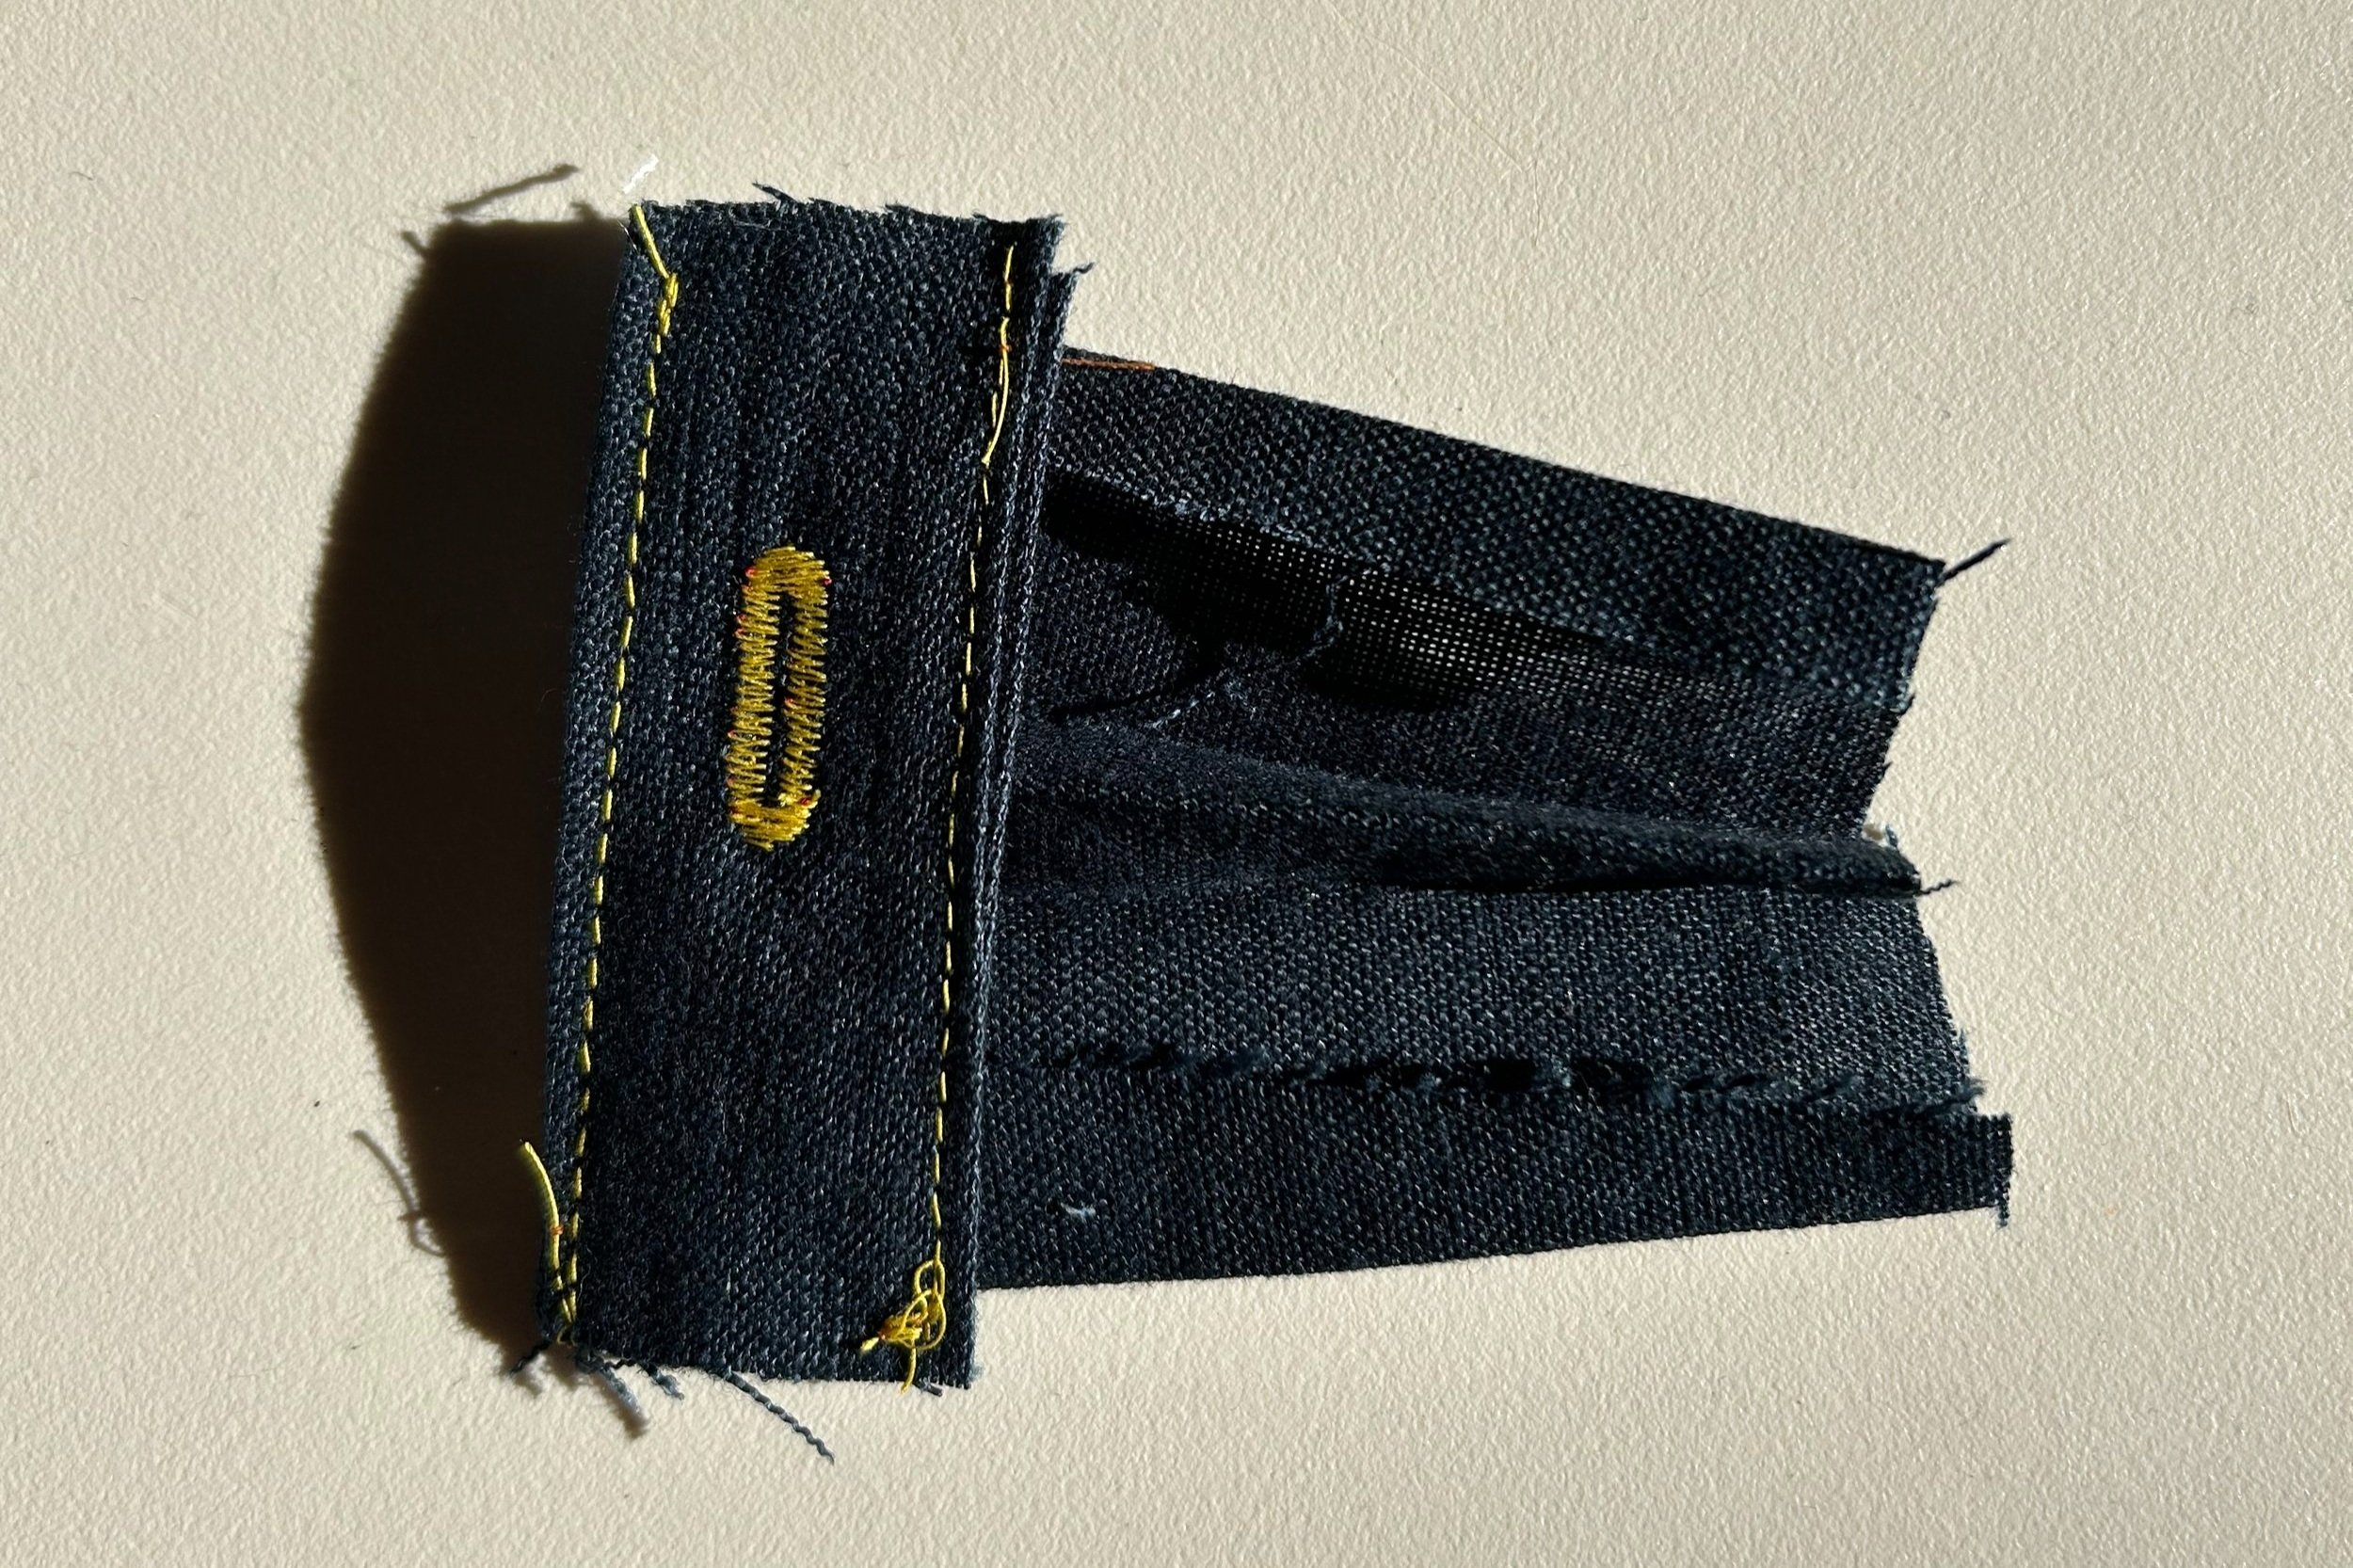
Hopefully whatever project you have been sewing, has directed and shown you how to grade your seam allowances usually that is cutting down one by half and one by 3/4 depending on your project. In the jeans example below you can see the difference between ungraded allowances and heavily graded seam allowances. One creates a perfectly flat surface where the presser foot can move back-and-forth with no interference from the extra layers of allowance, and the other has three sides of seam allowance, where the presser foot will have to move up and down in between those in order to sew the button hole.

Ungraded seam allowance on a waistband

Heavily graded seam allowance (yes, I sewed this inside out just to show you what’s happening inside yer pants)

Always make sure to clip your corners as close as you can and to cut down each seam allowance by a different amount if possible. The bottom finished waistband has two examples of heavy duty buttonholes. You can also just sew over yours twice to make sure they are nice and dense with thread!
If you are stuck and you can’t get your seam allowances even and flat enough for your presser foot to sit flat on top of your fabric, you can also cut a couple squares of quilting cotton making sure that they fit perfectly in that little valley in between your seam allowances. Insert them so that when your sewing machine is sewing the button hole, it’s feeding everything evenly because everything is on a flat plane . If you choose to go that route, make sure that you add a smidge of length to your button hole because it will now be harder to get your button into the same size button hole.
Please let me know if this helps you finish a project that has been hanging around for too long or if you have any questions. Thank you so much for being a member!


